Overflow Dungeon (OFD): Difference between revisions
No edit summary |
No edit summary |
||
| Line 175: | Line 175: | ||
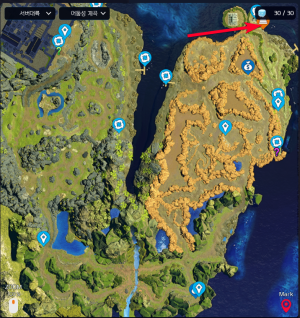
== OFD C: Infinite Mountain == | == OFD C: Infinite Mountain == | ||
[[File:OFD C TICKET.png|frameless|right]] | |||
<div class="mw-collapsible mw-collapsed" id="mw-customcollapsible-myDivision1">[[File:OFD C TICKET.png|frameless|right]][[File:OFD C LOCATION.png|frameless]]</div> | <div class="mw-collapsible mw-collapsed" id="mw-customcollapsible-myDivision1">[[File:OFD C TICKET.png|frameless|right]][[File:OFD C LOCATION.png|frameless]]</div> | ||
<span class="mw-customtoggle-myDivision1"><u>Show/Hide Location</u></span> | <span class="mw-customtoggle-myDivision1"><u>Show/Hide Location</u></span> | ||
| Line 341: | Line 342: | ||
== OFD D: Desert Area == | == OFD D: Desert Area == | ||
[[File:OFD D TICKET.png|frameless|right]] | |||
<div class="mw-collapsible mw-collapsed" id="mw-customcollapsible-myDivision2">[[File:OFD D TICKET.png|frameless|right]][[File:OFD D LOCATION.png|frameless]]</div> | <div class="mw-collapsible mw-collapsed" id="mw-customcollapsible-myDivision2">[[File:OFD D TICKET.png|frameless|right]][[File:OFD D LOCATION.png|frameless]]</div> | ||
<span class="mw-customtoggle-myDivision2"><u>Show/Hide Location</u></span> | <span class="mw-customtoggle-myDivision2"><u>Show/Hide Location</u></span> | ||
| Line 351: | Line 353: | ||
== OFD E: Dark Castle Valley == | == OFD E: Dark Castle Valley == | ||
[[File:OFD E TICKET.png|frameless|right]] | |||
<div class="mw-collapsible mw-collapsed" id="mw-customcollapsible-myDivision3">[[File:OFD E TICKET.png|frameless|right]][[File:OFD E LOCATION.png|frameless]]</div> | <div class="mw-collapsible mw-collapsed" id="mw-customcollapsible-myDivision3">[[File:OFD E TICKET.png|frameless|right]][[File:OFD E LOCATION.png|frameless]]</div> | ||
<span class="mw-customtoggle-myDivision3"><u>Show/Hide Location</u></span> | <span class="mw-customtoggle-myDivision3"><u>Show/Hide Location</u></span> | ||
| Line 361: | Line 364: | ||
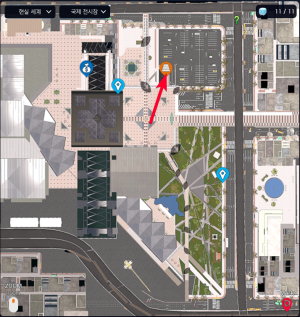
== OFD F: International Exhibition Center == | == OFD F: International Exhibition Center == | ||
[[File:OFD F TICKET.png|frameless|right]] | |||
<div class="mw-collapsible mw-collapsed" id="mw-customcollapsible-myDivision4">[[File:OFD F TICKET.png|frameless|right]][[File:OFD F LOCATION.png|frameless]]</div> | <div class="mw-collapsible mw-collapsed" id="mw-customcollapsible-myDivision4">[[File:OFD F TICKET.png|frameless|right]][[File:OFD F LOCATION.png|frameless]]</div> | ||
<span class="mw-customtoggle-myDivision4"><u>Show/Hide Location</u></span> | <span class="mw-customtoggle-myDivision4"><u>Show/Hide Location</u></span> | ||
Revision as of 17:22, 5 January 2024
Overflow Dungeons (OFDs) are instances where the tamer must face a predetermined team in a battle with no substitutions for rewards.
An entry pass is consumed with each entry and they can be obtained from the left notice board in the Village of Beginnings after the tamer has completed all main quests on the OFD map.
Example: OFD B is only unlocked after you complete all main quests on Gear Savannah.
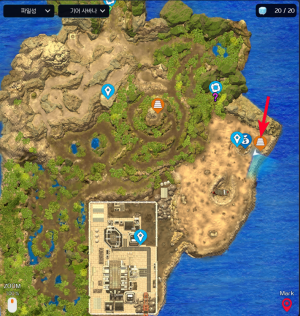
OFD B: Gear Savannah
Show/Hide Location
Open on: Tuesday, Thursday and Saturday (In Korea)
OFD NPC: Patamon
Enemy Level Range: 21~50
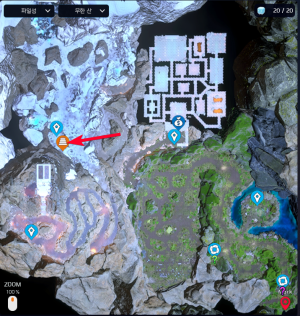
OFD C: Infinite Mountain
Show/Hide Location
Open on: Wednesday, Friday, Sunday (In Korea)
OFD NPC: Gomamon
Enemy Level Range: 41~60
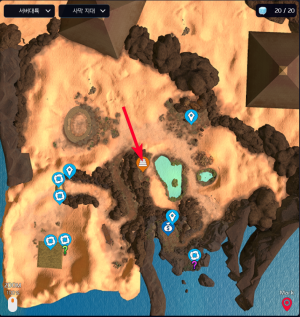
OFD D: Desert Area
Show/Hide Location
Open on: Tuesday, Thursday, Saturday (in Korea)
Enemy Level Range: Very easy
Click here to View the enemies and Rewards
OFD E: Dark Castle Valley
Show/Hide Location
Open on : Monday, Friday, Sunday (in Korea)
Enemy Level Range: Very easy
Click here to View the enemies and Rewards
OFD F: International Exhibition Center
Show/Hide Location
Open on : Monday, Wednesday, Saturday (in Korea)
Enemy Level Range: Very easy
Click here to View the enemies and Rewards
Piyomon's Red Data Exchange
In Village of Beginnings, you can trade the OFD data with the Piyomon NPC
The exchanges prices are:
Dictionary: 10x OFD data
Flute: 8x OFD data
Rookie Cube: 6x OFD data
Champion Cube: 12x OFD data
Ultimate cube: 20x OFD data
Broken Zero Unit: 32x OFD data
Zero Unit: 16x OFD data
Shiny Zero Unit: 32x OFD data
Potential Piece: 4x OFD data
